Saturday, June 15, 2013

Pasta with Greens, Gruyere and Bacon

Pasta with Greens, Gruyere and Bacon. Cooking Chat recipe.
Gruyère is one of my favorite cheeses. The rich nuttiness makes it a tasty snack on its own, and it also melts nicely to impart a lot of flavor when cooking. So when I was asked if I wanted to sample  cups Emmi Kaltbach™ Cave-aged Le Gruyère®  I quickly agreed. Though I was tempted to just crack it open when it arrived and start nibbling, I waited a week or so to plot what I wanted to make with it. When last weekend's weather didn't look good for grilling, it seemed like a good time for a pasta dish featuring the Gruyere cheese. Collard greens were on sale, so I grabbed them to combine with the cheese and bacon, and I was well on my way to a tasty new dish! You can easily substitute other greens here. This method for fixing the greens along with the bacon is also my go-to way of fixing them as a side dish.

3 cloves garlic, minced
1 bunch collard greens, coarsely chopped
½ cup or so chicken broth
1 or 2 slices bacon
pinch salt & red pepper flakes
1 tbsp balsamic vinegar
2 tbsp olive oil
bit of fresh oregano (or other fresh herb you have on hand)
1/2 cup Emmi Kaltbach™ Cave-aged Le Gruyère® cheese, shredded (plus extra to serve at table)
12 ozs elbow macaroni or other short pasta

Heat a large pot on medium high and spray with cooking oil (I use olive oil). Add the bacon and cook until it is nice and crispy. Remove the bacon from the pan and cool it on paper towel set on a plate to absorb the excess grease. Pour most of the extra grease out of the pan, but leave a bit for that bacon flavor! When the bacon is cool, crumble it into bite sized pieces and set it aside to add to the dish later.

Add a tablespoon of the olive oil to the pan, heat on medium. Add the garlic, cook for a minute or so until it starts getting fragrant. Gradually add the greens in a few batches, stirring the greens as you add them so they get well coated with the oil and garlic. Add a light pinch of salt, then stir in the chicken broth and balsamic vinegar. (You could certainly use other cooking liquid in place of chicken broth). Heat the liquid until it begins to simmer, then cover to cook gently on moderate heat. Stir the greens occasionally. You'll want to braise the greens for at least 20 minutes, 30 is better if you have time, so they get nice and tender, absorbing the garlic and broth flavor. Add the oregano and red pepper flakes about halfway through the greens cooking time.

Start boiling the water for pasta after you've added the greens. Cook the pasta according to package instructions. Drain the pasta when it's done, then toss the pasta with the greens. Be sure to use up all the good liquid from cooking the greens to capture all the nutrients and flavor. After mixing the greens and pasta, stir in the cheese followed by the bacon. Serve at the table with a bit of extra grated Gruyère , and enjoy! This can be a main course, though we did have a bit of salmon on the side, and served with a nice Greek white wine.

Full disclosure: The Gruyère was provided to me as a free sample. The recipe is my own creation!
Saturday, June 8, 2013

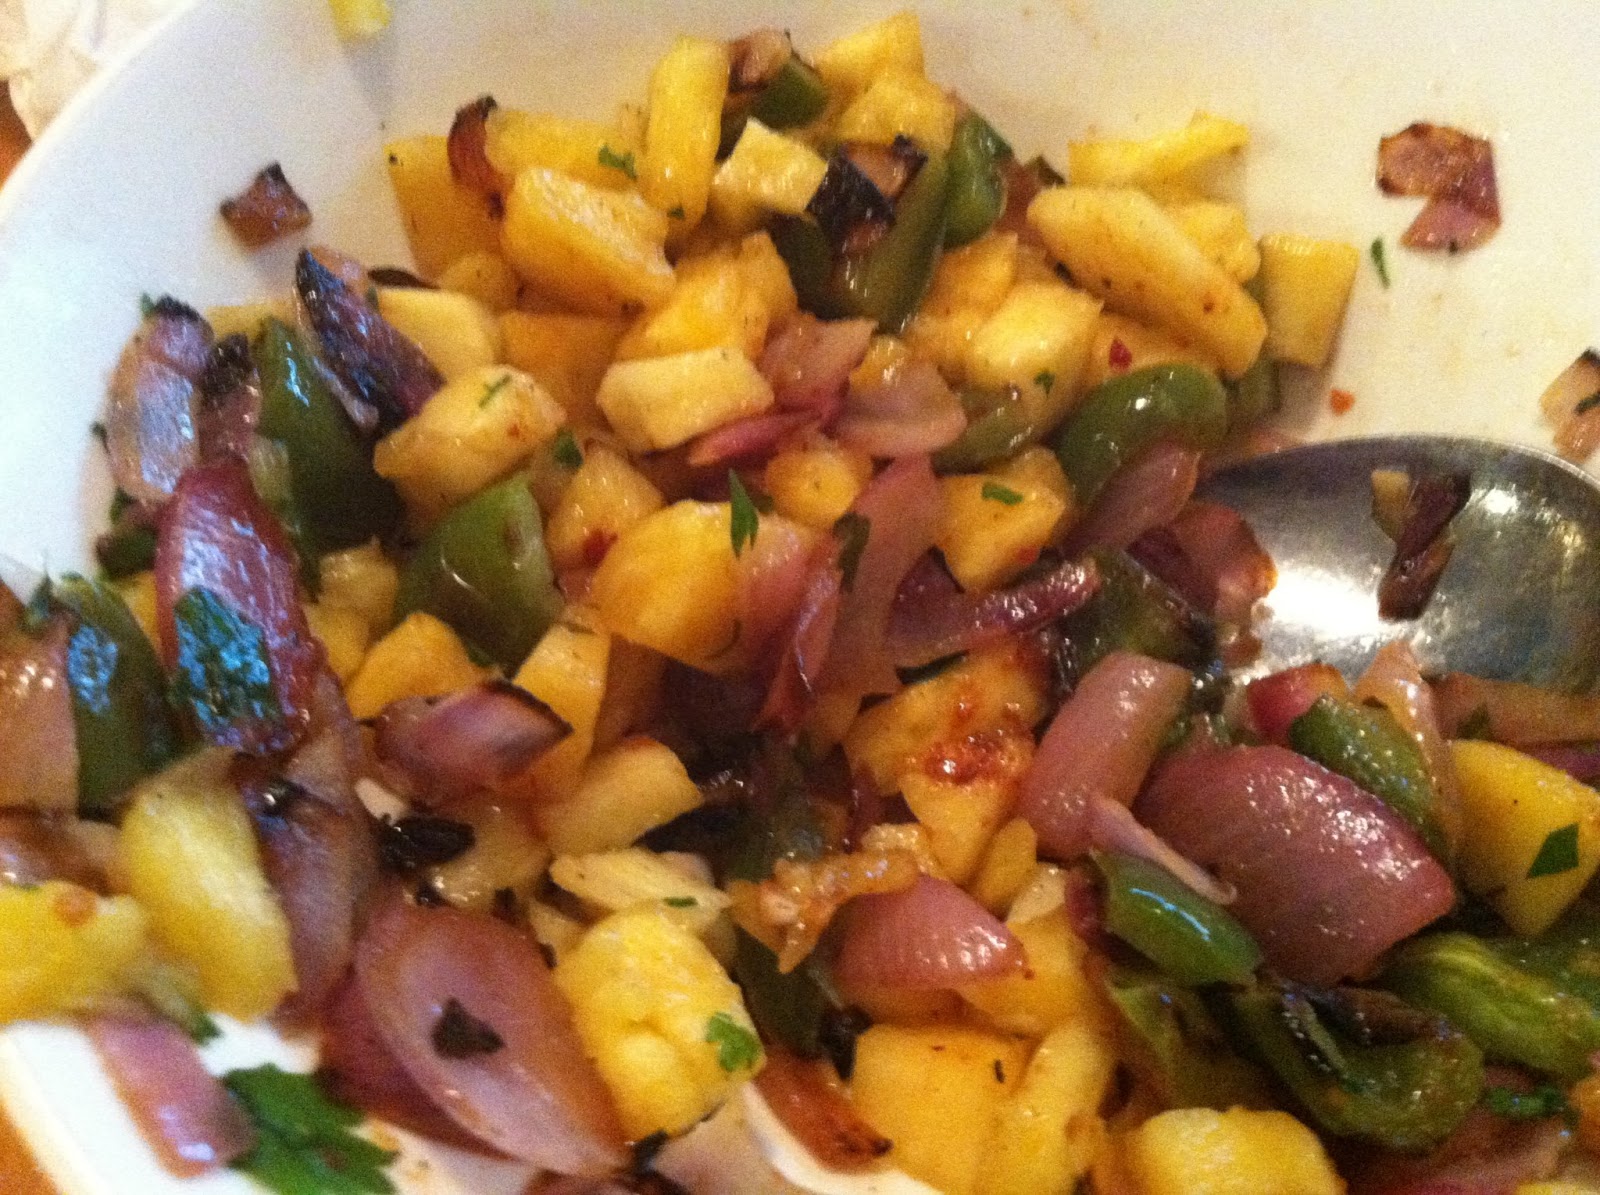
Grilled Chicken with Pineapple Salsa


You don't mind easy recipes, do you? If not, I'll keep them coming! Been a busy spring, not much time for fancy or complicated here. But I am still coming up with some tasty new creations, like this Grilled Chicken with Pineapple Salsa. I also used the salsa with mahi mahi I grilled the same night, which also worked nicely too.

Chicken Marinade
2 clove garlic, minced
2 tbsp cilantro, chopped
3 tbsp olive oil
½ of a lime, juiced
1/4 tsp salt

3 chicken breast fillets, rinsed and patted dried

Pineapple Salsa
1 cup fresh pineapple, chopped into small pieces (I cut a typical pineapple chunk size into quarters).
1 small red onion & ½ green bell, coarsely chopped & grilled (see grilling note below)
bit of cilantro, chopped
juice of ½ lime
tsp chipotle in adobo sauce (optional, you could also add a pinch of cayenne for kick, or add a jalapeno to grilled onions and peppers)

Start by combining the marinade ingredients in a medium bowl. Add the chicken breasts, toss them to get the chicken well covered with the marinade. Cover and put the chicken in the refrigerator, unless you are doing a quick marinade (e.g. 15 minutes or less.  I marinaded for about an hour, which was came out well, but I'd say you could do up to 4 hours if you wanted.

Pre-heat the grill to medium high. Toss the onion and peppers with olive oil, then spread them into a grill pan. Grill them for about 15 minutes, stirring occasionally, so that get nicely cooked and a tad charred all over. If you don't have a grill pan, you can wrap the peppers and onions in aluminum foil to cook on the grill, though I really prefer the grill pan for the charring effect.

You can start combining the salsa ingredients as the peppers and onions are grilled. Toss those in with the rest of the ingredients when they are done and have cooled a bit. Set the salsa aside while you grill the chicken. You could also make the salsa in advance, it tasted great the 2nd day after the flavors had a chance to meld.

Get the chicken ready to grill by shaking off the excess marinade, reserving the extra in the bowl. Put the chicken on the grill, flipping the chicken after about 5 minutes. Brush the chicken with the extra marinade after flipping it to help keep the chicken moist. The chicken takes about 10 minutes to be ready, check for doneness at that time. I simply cut it open a bit to see that it is white all the way through, though you can use a thermometer too. Remove the chicken from the grill. Plate the chicken topped with plenty of pineapple salsa and enjoy!

The photo below is actually of the salsa served on the mahi mahi, along with some greens and blackeyed peas. We concluded the chicken came out better and more blog worthy, after eating it sans photo!


Saturday, May 25, 2013

Quick No-Cook Chipotle Sauce for Chicken


I love the chipotle taste, but these flavorful peppers tend to be used in small doses. I often find myself buying a can of the chipotles in adobo sauce, and only needing a small amount for the original recipe. So I was eager to find another use for what I had on hand this week, and hit upon this quick and easy sauce. Just a few minutes to whip it up, and it was very tasty served over plain baked chicken breasts. The next night I added some to a refried bean burrito and that was good, too. This is a handy one to have in your repertoire if you are a chipotle fan.

Here's the simple ingredient list:

14.5 oz can diced tomatoes
1 chipotle pepper in adobo sauce
1 tsp cumin
pinch cinnamon
1 clove garlic

Simply place all these items in a food processor, puree, and voila! You've got a tasty sauce that's a nice flavor boost to your meal. I served this with a bit of cheese, a tortilla and a side of kale with bacon. If you find another way to use it, I'd love to hear about it!

Saturday, May 11, 2013

A Taste of Saratoga Springs


When Jodi came home from a conference with the surprise that she'd won a stay at Batcheller Mansion Inn in Saratoga Springs, New York, I looked forward to the chance to get away and relax in a nice setting. I was pleasantly surprised by the way our recent stay there turned into quite a nice treat for this foodie, too! Let me share some of the highlights in case you find yourself visiting--or, if you're weighing options for a long weekend destination, perhaps this taste of Saratoga might nudge you in that direction.

After four hours of driving to get to our destination, we were ready for a stroll into Downtown Saratoga to quench our thirst. A brewpub called Druthers was our first stop, and Jodi and I both enjoyed our beers. I opted for their All in IPA, and liked its lively hoppiness.

Foursquare's "discover" feature helped us find our dinner spot. Maestro's at the Van Dam Hotel got a lot of good reviews, and we weren't disappointed at picking this spot for our dinner.  They have a creative menu focusing on fresh local ingredients and seem to make as much as they can themselves. We opted for the three course prix fixe, which is just $33. That turned out to be a good choice. I started with some homemade mortadella, served along with very tasty mustard that they also made (if you like mustard, order something that will give you an excuse to try theirs!). The Qupe Chardonnay was a nice pairing for this dish. I'd previously enjoyed some Qupe zinfandel, I liked the nice clean taste of their chard.
I had a Faroe Island salmon dish for my main course that night, served with a 2010 Evening Land Pinot Noir from Oregon. A nice combination! My biggest critique of Maestro's is they could improve their lighting so us food bloggers could do their food more justice! They nicely offered to substitute a cheese course at the end of the meal in place of the regular dessert. I was more in the mood for savory to enjoy with the remainder of our pinot, so appreciated their accommodating my whims.
Breakfast both mornings at the Batcheller Mansion both mornings was a treat. Dining room is gorgeous, and Jodi and I got a nice window seat that gave us a good view of the early spring morning, not to mention better light for my food photos (see omelette top of page). Our gracious host cooked our meal to order as we nibbled on tasty homemade scones. I could get used to that!

We headed to the Spanish restaurant Boca Bistro for lunch on our one full day in town. Tapas and a salad sounded like a light choice after a hearty breakfast. It was tasty but we could have ordered one less plate! Definitely a good spot for lunch or dinner, with some good Spanish wine selections.

We stopped by the Wine Bar for a glass before heading to dinner. They do have a full menu there, too, but we wanted to try a place recommended by my sister and brother-in-law for our meal. The Wine Bar has an interesting list of wines, so I wanted to try something different and ordered a glass of Zilavka, a grape native to the around the former Yugoslavia. Nice views of Downtown Saratoga as we sipped our drinks!


Our final foodie stop for the day was dinner at Chianti Il Ristorante. The picture of the salad was better, so that is shown below. But the highlight there was definitely the main course risotto with filet mignon. Very extravagent, and as tasty as it sounds! After conferring with our knowledgeable server, we landed on a Nebbiolo to go with our meal. As is often the case, getting a bit outside the pricey Barolo region led  us to a good value with this wine choice.
As you can see, we managed to pack a lot of good eating into less than two days in Saratoga! I hope if you find yourself there you too enjoy a good taste of the town.

Saturday, April 20, 2013

Super-Quick Pasta with Tomato Onion Sauce and Leftover Chicken


This dish is so simple I almost wasn't going to post it. But perhaps you, too, find yourself with a bit of leftover cooked chicken on hand and are looking for a little inspiration. The combination of onions, tomato and chicken, with some feta and olives tossed in, came out very nicely. You might want to duplicate this or make up you own version.

I started by chopping one sweet onion and sauteeing it in some olive oil until it started to caramelize, about 10 minutes. Added two cloves garlic, minced, and sauteed for another minute. Then in goes a 14.5 oz. can of diced tomatoes and a tsp of dried oregano, simmered on medium heat. I started cooking the small pasta shells at the same time I started cooking the tomatoes. After the tomatoes simmered for about 10 minutes, I added the leftover chicken breast along with a handful of sliced kalamata olives. I had about 8 ozs or so, cut into bite sized pieces. I just wanted the chicken to get heated up but not really cook any more.

Once the pasta was cooked and drained, it gets tossed with the tomato/chicken sauce, along with a 1/2 cup or so of feta cheese. Then you've got a quick, tasty meal ready to enjoy!

Saturday, April 6, 2013

Ile de France Brie with a Côtes du Roussillon Red Wine


I'm always up for some wine and food pairing fun! So when the folks at Ile de France Cheese ask me on Twitter if I'd like to try to come up with a wine pairing for one of their cheeses, I readily accepted. There were a couple bottles of French wine I had on hand that I thought I might try, which I had in mind when selected the cheese. We've always been brie fans here, so I opted for that over the goat cheese and blue cheese that were available at the grocery store.

Chardonnay was the first idea that came to mind for pairing with brie, and that was one of the more frequently mentioned suggestions in my quick online research. I was more in the mood for red wine, however, and lighter wines with acidity like Pinot Noir were often recommended. Enough with the web research, I was ready to open up the cheese and some wine and try for myself!

First, I opened a Beaujolais, which I'd also come across on the web as a suggested pairing. It has a similar body and acidity like Pinot, making if food friendly. Should work great with the brie, right? Well, this wine was very austere, and that acidity seemed to clash with the creaminess of the brie. I tried decanting the Beaujolais. It opened up a bit, I like the wine better, with some blackberry fruit showing, but alas, not a winner for this brie.

Then I found a winning pairing for the Ile de France Brie. The 2009 Domaine Gauby Les Calcinaires Côtes du Roussillon Villages had nice plummy fruit and a touch of spice. But what really made it work in my estimation was the silky smooth mouthfeel with a long finish. That silky mouthfeel matched very nicely the creaminess of the cheese, so going between bites of cheese and sips of wine was a continuous, pleasurable experience.

This Côtes du Roussillon is a blend of Syrah (50%), Mourvedre, Grenache Noir, and Carignan. The bottle goes for an average price of about $25. I suspect you'd do well pairing this Brie with other reds from Roussillon with a similar blend, and you might also enjoy it with a Côtes du Rhone with Syrah and Grenache.

This experiment is a good reminder that with wine and food pairings, you've got to let your own taste decide. On paper (or the web), the Beaujolais should have worked according to the expert commentary. But I branched out, tried something that I thought might work, and found a very nice pairing! Be willing to try different combinations, and pay attention to how the two work together for YOU, and you'll be well on your way to discovering great pairings for yourself.

Saturday, March 23, 2013

Anna's Dolcetto with Pasta and Abruzzi-Style Lamb Sauce


Last Friday evening I was finding so many great recipes browsing through the current Food & Wine anniversary edition. Then I remembered Pairings Wine & Food was planning to have Anna Maria Abbona, a winemaker from Italy's Piemonte region, pouring samples on Saturday. That helped me narrow down my food plans. I decided on making the Pasta with Abruzzi-style Lamb Sauce, figuring I'd likely sample a wine that would work well with it.

As suspected, there Anna was pouring a great lineup of six wines when I arrived at Pairings. We started by tasting their entry level Langhe Dolcetto, from young vines Anna planted herself. She shared her grandfather's wisdom that "You don't plant a vineyard for yourself. It's for your grandchildren." Well, I liked the way this first Dolcetto was drinking right now as a nice everyday, food-friendly bottle. The next two in the lineup seemed to have potential to pair with our meal. There was a Barbera was good, but I simply liked the fruit forward Dolcetto Di Dogliani Doc "Sori Dij But", a bit better and chose that for our pairing. The tasting also included a well-structured Nebbiolo, and a Dolcetto from the vineyard that Anna's grandfather planted for her--the Dogliani DOCG "Maioli". This provided a nice example of the quality of older vines, creating a more austere and complex wine.

So I left Pairings with some food-friendly Italian wine, ready to make the meal I chose with the wine in mind. You can pop over to the Food & Wine site for all the Abruzzi-Style Lamb Sauce recipe details, but I'll give the visual highlights of the simple recipe below. After sauteeing some onions, you add pancetta and chopped rosemary and start getting some great smells!

Then brown the finely diced lamb shoulder (1 good size lamb arm chop gave me the amount of meat I needed).

After the lamb is browned, some wine gets added, followed by a 28 oz can of diced tomatoes.

For a good measure, I put the bone in to simmer for awhile, getting some extra flavor from the fat and meat I had managed to cut off. After the tomatoes simmer for about 20 minutes, you stir in the pasta and a nice portion of cheese. The recipes calls for pecorino, but I had some great Parmigiano Reggiano on hand that I used instead, with good results.


I served the pasta with a green salad and extra cheese at the table. This was a very flavorful sauce despite a relatively short cooking time. I can see why it made the Food & Wine favorites list! As anticipated Anna's Dolcetto enhanced the flavors of the meal chose anticipating her visit, a nice balance of fruit and acidity. I enjoyed the wine on its own when I sampled it, but it really shines with the right food, as is so often the case with good Italian wine! Not the first time I've picked a recipe based on the wine I wanted to serve, and it won't be the last.
Note: I wasn't originally planning to blog about this so limited photos from the winemaker visit and I don't have the vintage years in. Will try to update with that info.